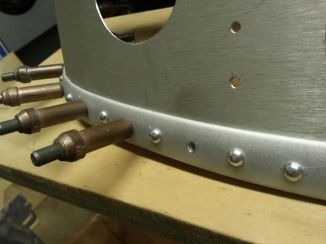
Here we are riveting the panel back together. We had to fully disassemble it and we cut new aluminum for the instruments because some of them were not going back in. We cut the holes in the aluminum with a fly cutter. Sorry I don’t have pics of this but it can be a very tedious job getting the cutter set to the right size and position. We did end up reusing the bezel of the panel. We cleaned it off with a bead blaster before starting to rivet everything back together again. The rivets that were used were an non structural rivet designed mainly for show. If you look closly you will see that they are raised more than normal. Since we didn’t have a die for these ( and a bucking bar wasn’t going to cut it) Gary fabricated a die for us to use. Normally when you buy rivets they come pre-cut, but because these are not a structural rivet we had to cut them down. This was done quite easily with a tool made just for that, set your length for the rivet ( 1 1/2 the diameter of the rivet) and squeeze just like a pliers and your rivet is ready to go. The process went quite smooth with two people. One to hold the piece steady while the other one pounded the rivet setting tool. Just make sure you mark what hole need a rivet in and which ones don’t! I guess we had to learn how to drill rivets out anyway…
