The fuselage is Blue!

The fuselage is Blue!

Before the holidays we were taping off the fuselage for painting. Well what do you think of the final outcome? It has it’s first coat here. We had to put a couple coats of poly-brush to seal up the fabric. Then a couple coats of silver for UV protection. We didn’t get pictures of all these steps but it is similar to the wings and control surfaces if you want to see what the different stages look like. Next we will be working on the yellow lines down the fuselage.

Covering the second wing

Covering the second wing

Sorry for the long delay in posts. Between the winter weather, vacations and work schedules I haven’t been able to get around to keeping up with the project. So now we will have to catch everyone up on where we are with the project.

In this photo they were covering the second wing. This is the wing that needed a lot of repair before we covered it. Now that things are all repaired we will go ahead and cover.

When we cover the wings we first go around the edges of the fabric with poly-tac and get the fabric “glued” down to the wing structure. Then later we come back with a normal iron and shrink the fabric. The fabric will shrink depending on the temp you are using, so start with a lower temp! Getting out all the bumps and wrinkles is the biggest concern.

Covering the Fuselage

Covering the Fuselage

We had to cover the fuselage in preparation for spraying it with poly-brush. Just like prepping trim in a house every bit of metal that was showing had to be covered with tape or paper to prevent over spray. If some poly-brush gets on the metal that is already painted it may allow the color to bleed into the fabric and also with poly-brush on the metal it wouldn’t cover well. A few coats of clear poly-brush and we will be ready to start with silver. I hope that everyone did a good job with those irons!

Cutting out Gromets

Cutting out Gromets

Here we are cutting out some fabric to be put on the back part of the fuselage. The control cables for the rudder and elevator pass through the fabric and we are putting these on to strengthen the fabric more so it will not rip. As you can see we have a special kind of scissors we use for this called a pinking shears. This allows us to get a good pinked (jagged) edge. The most difficult part of this job was making sure we glued the patches on in the right spot. The cables are not in at this point so we are going off the old pieces of fabric. Well see how close we were when everything is rigged!

Riviting the Panel

Riviting the Panel

Here we are riveting the panel back together. We had to fully disassemble it and we cut new aluminum for the instruments because some of them were not going back in. We cut the holes in the aluminum with a fly cutter. Sorry I don’t have pics of this but it can be a very tedious job getting the cutter set to the right size and position. We did end up reusing the bezel of the panel. We cleaned it off with a bead blaster before starting to rivet everything back together again. The rivets that were used were an non structural rivet designed mainly for show. If you look closly you will see that they are raised more than normal. Since we didn’t have a die for these ( and a bucking bar wasn’t going to cut it) Gary fabricated a die for us to use. Normally when you buy rivets they come pre-cut, but because these are not a structural rivet we had to cut them down. This was done quite easily with a tool made just for that, set your length for the rivet ( 1 1/2 the diameter of the rivet) and squeeze just like a pliers and your rivet is ready to go. The process went quite smooth with two people. One to hold the piece steady while the other one pounded the rivet setting tool. Just make sure you mark what hole need a rivet in and which ones don’t! I guess we had to learn how to drill rivets out anyway…

Taping The Tail

Taping The Tail

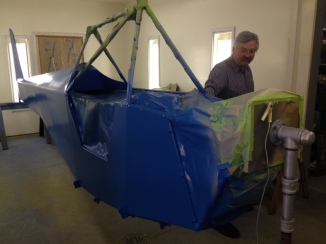
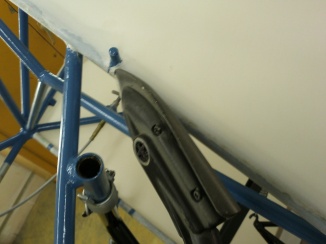
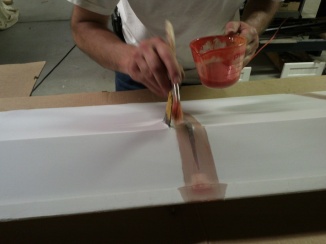
So we had a chance to get back to work on the project. We are still taping the fuselage, around the firewall and across all the tubes that are against the fabric from the inside. This protects the fabric from wear on the frame when it is flying. On most of the fuselage we are using clear poly-brush. When we paint it from the outside it doesn’t matter what color we use on the tapes but when you look inside the cockpit you can see all the red tapes. Since we are trying to keep the look clean we used clear to make it all look the same. On the tail, however we did use the red poly brush because you are not able to see inside of it from the fuselage.

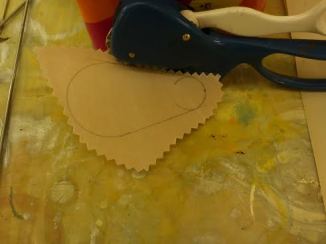
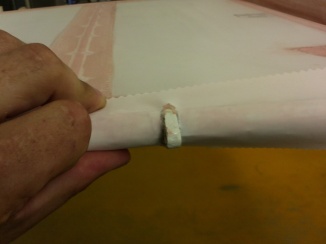
Some of the places we have to get creative in cutting out the tapes to get them to fit and look good when they are on. I was cutting the tapes like you would when you make a snowflake out of paper, fold it and cut out the middle this gave me a nice even hole that can be shaped around the rudder support.

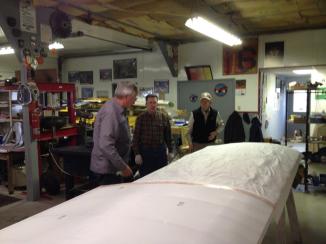
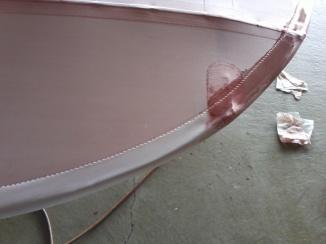
When gluing down some of the long tapes you have to be careful that you get them straight. This can prove to be difficult when the frame isn’t exactly straight.

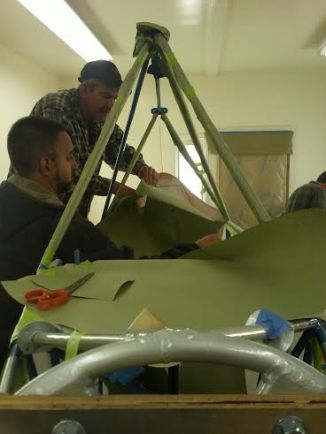
Also we had too much poly-tack on an area of the tail we were prepping for tape. An easy way to remove poly-tack is to get some MEK on a rag an just rub in off the fabric. MEK is a very strong chemical like acetone that we use to clean out brushes and the spray guns.

Next work night we will hopefully be getting the rest of the tapes on and a few drain holes set. Then we can iron it all down and get ready for silver! Yay, more spraying!

A Busy Summer

A Busy Summer

So summer has kinda gotten in the way and we have not been working on the project as much the past few weeks. Between Oshkosh and all the other outdoor events it can be difficult to get everyone together in the shop to work on the project. I feel this would happen if I had a project of my own though, During winter we would get a lot done but when it is nice out it is time to go fly and enjoy the nice evenings.

Since I don’t have much recent news on the project this is a picture of the tail feathers that were painted a few months ago. We spent a few months prepping these for final coat with the silver process. You can check all that out in the earlier posts. This was my first major paint job so it took a few tries to get it right. At first I had a problem of putting the paint on too thick. When I was spraying I was moving too slow and that was causing a lot of paint to lay on the parts. They looked great when they dried but we kept getting runs around the edges and you can’t hide them very well, so I would have to sand them off and start again. Once I figured out that I was spraying too slowly I started to move the gun faster but then we noticed dry spots on the parts. Getting the paint just right and being able to see when you have enough on is a skill not easily learned. I was able to find the happy medium where the parts turned out great, but it wasn’t on the second, third or even fourth try. That is all apart of this project though, learning what works and what doesn’t.

Well fall is just around the corner so hopefully we can get some more work done soon!

Taping The Wing Tip

Taping Wing Tip

Here we are taping the final tape that goes around the tip of the wing. It is a curved edge so it can be a bit of a challenge. We use a cross cut piece of tape, that means it can stretch around the edge of the wing. It takes up all the slack so you don’t see wrinkles where there would normally be extra tape. We first line up the tape and use clothes pins to hold it into place. Taking Poly-brush we tack the first few inches to have a good starting point and going 6 to 8 inches at a time we lay the tape down setting it in place. This can be a trick to get it looking straight or curved evenly around the edge. In the summer Poly-brush dries very quickly so we have to work quite fast to get all the tape on evenly. You get a few bubbles where the steel tubing structure is attached to the wood structure, we will take an iron later to shrink these out. Hopefully after a few coats of silver all the little bumps and ripples will be hidden and smooth.

A few weeks ago I had a chance to go to Oshkosh and see a lot of fabric covered aircraft. It really makes a difference on how much time you spend on the fabric during the prep time. There were some beautiful aircraft there, with nice seams and edges all ironed out. There were also some that are a great example of a rushed job, still flyable but of a lower quality and higher drag. Hopefully we can have the Eaglet at Oshkosh next year!

Ironing Fabric on the Fusalage

Ironing Fabric on the Fusalage

We had to go around the whole fuselage with an iron and smooth out any spots on the tubes that didn’t lay down nice. The corners and seams were gone over to be sure that they were all smooth. This fabric does shrink up to 10 percent when heat is applied. If there was a wrinkle or something in the fabric we would heat it up to get them out now before they become a problem later. This part does take a lot of time but the product is much better than if you were not to spend the time.
Some tips to remember, if you shrink the fabric too much you could crush the structure. We had a bit of a problem with this on the turtle deck area of the fuselage. The structure was not strong enough so the fabric pulled it a little. One other thing to remember, irons are hot! Yea, I burnt myself, I guess if you work with the iron for a few hours it is bound to happen.